Nurtured by Love

Category: Out on the property

  • Upgrading the trail

    Upgrading the trail

    I began working on a connecting trail from our property to the linear park below almost three years ago. I hacked in a goat-path of sorts: narrow and full of switchbacks. It changed my life, in that it made one of my favourite running trails a mere 3-minute scrabble from my door.

    Yeller McLeod, my birthday present to myself. He's a combination of tamper, rake and hoe.
    Yeller McLeod, my birthday present to myself. He’s a combination of a tamper, rake and hoe.

    But it wasn’t a great trail, technically speaking. Parts had a grade of more than 15%, it was narrow, there were a couple of places that were subject to erosion and the tight switchbacks meant that you couldn’t ride a mountain bike on it.

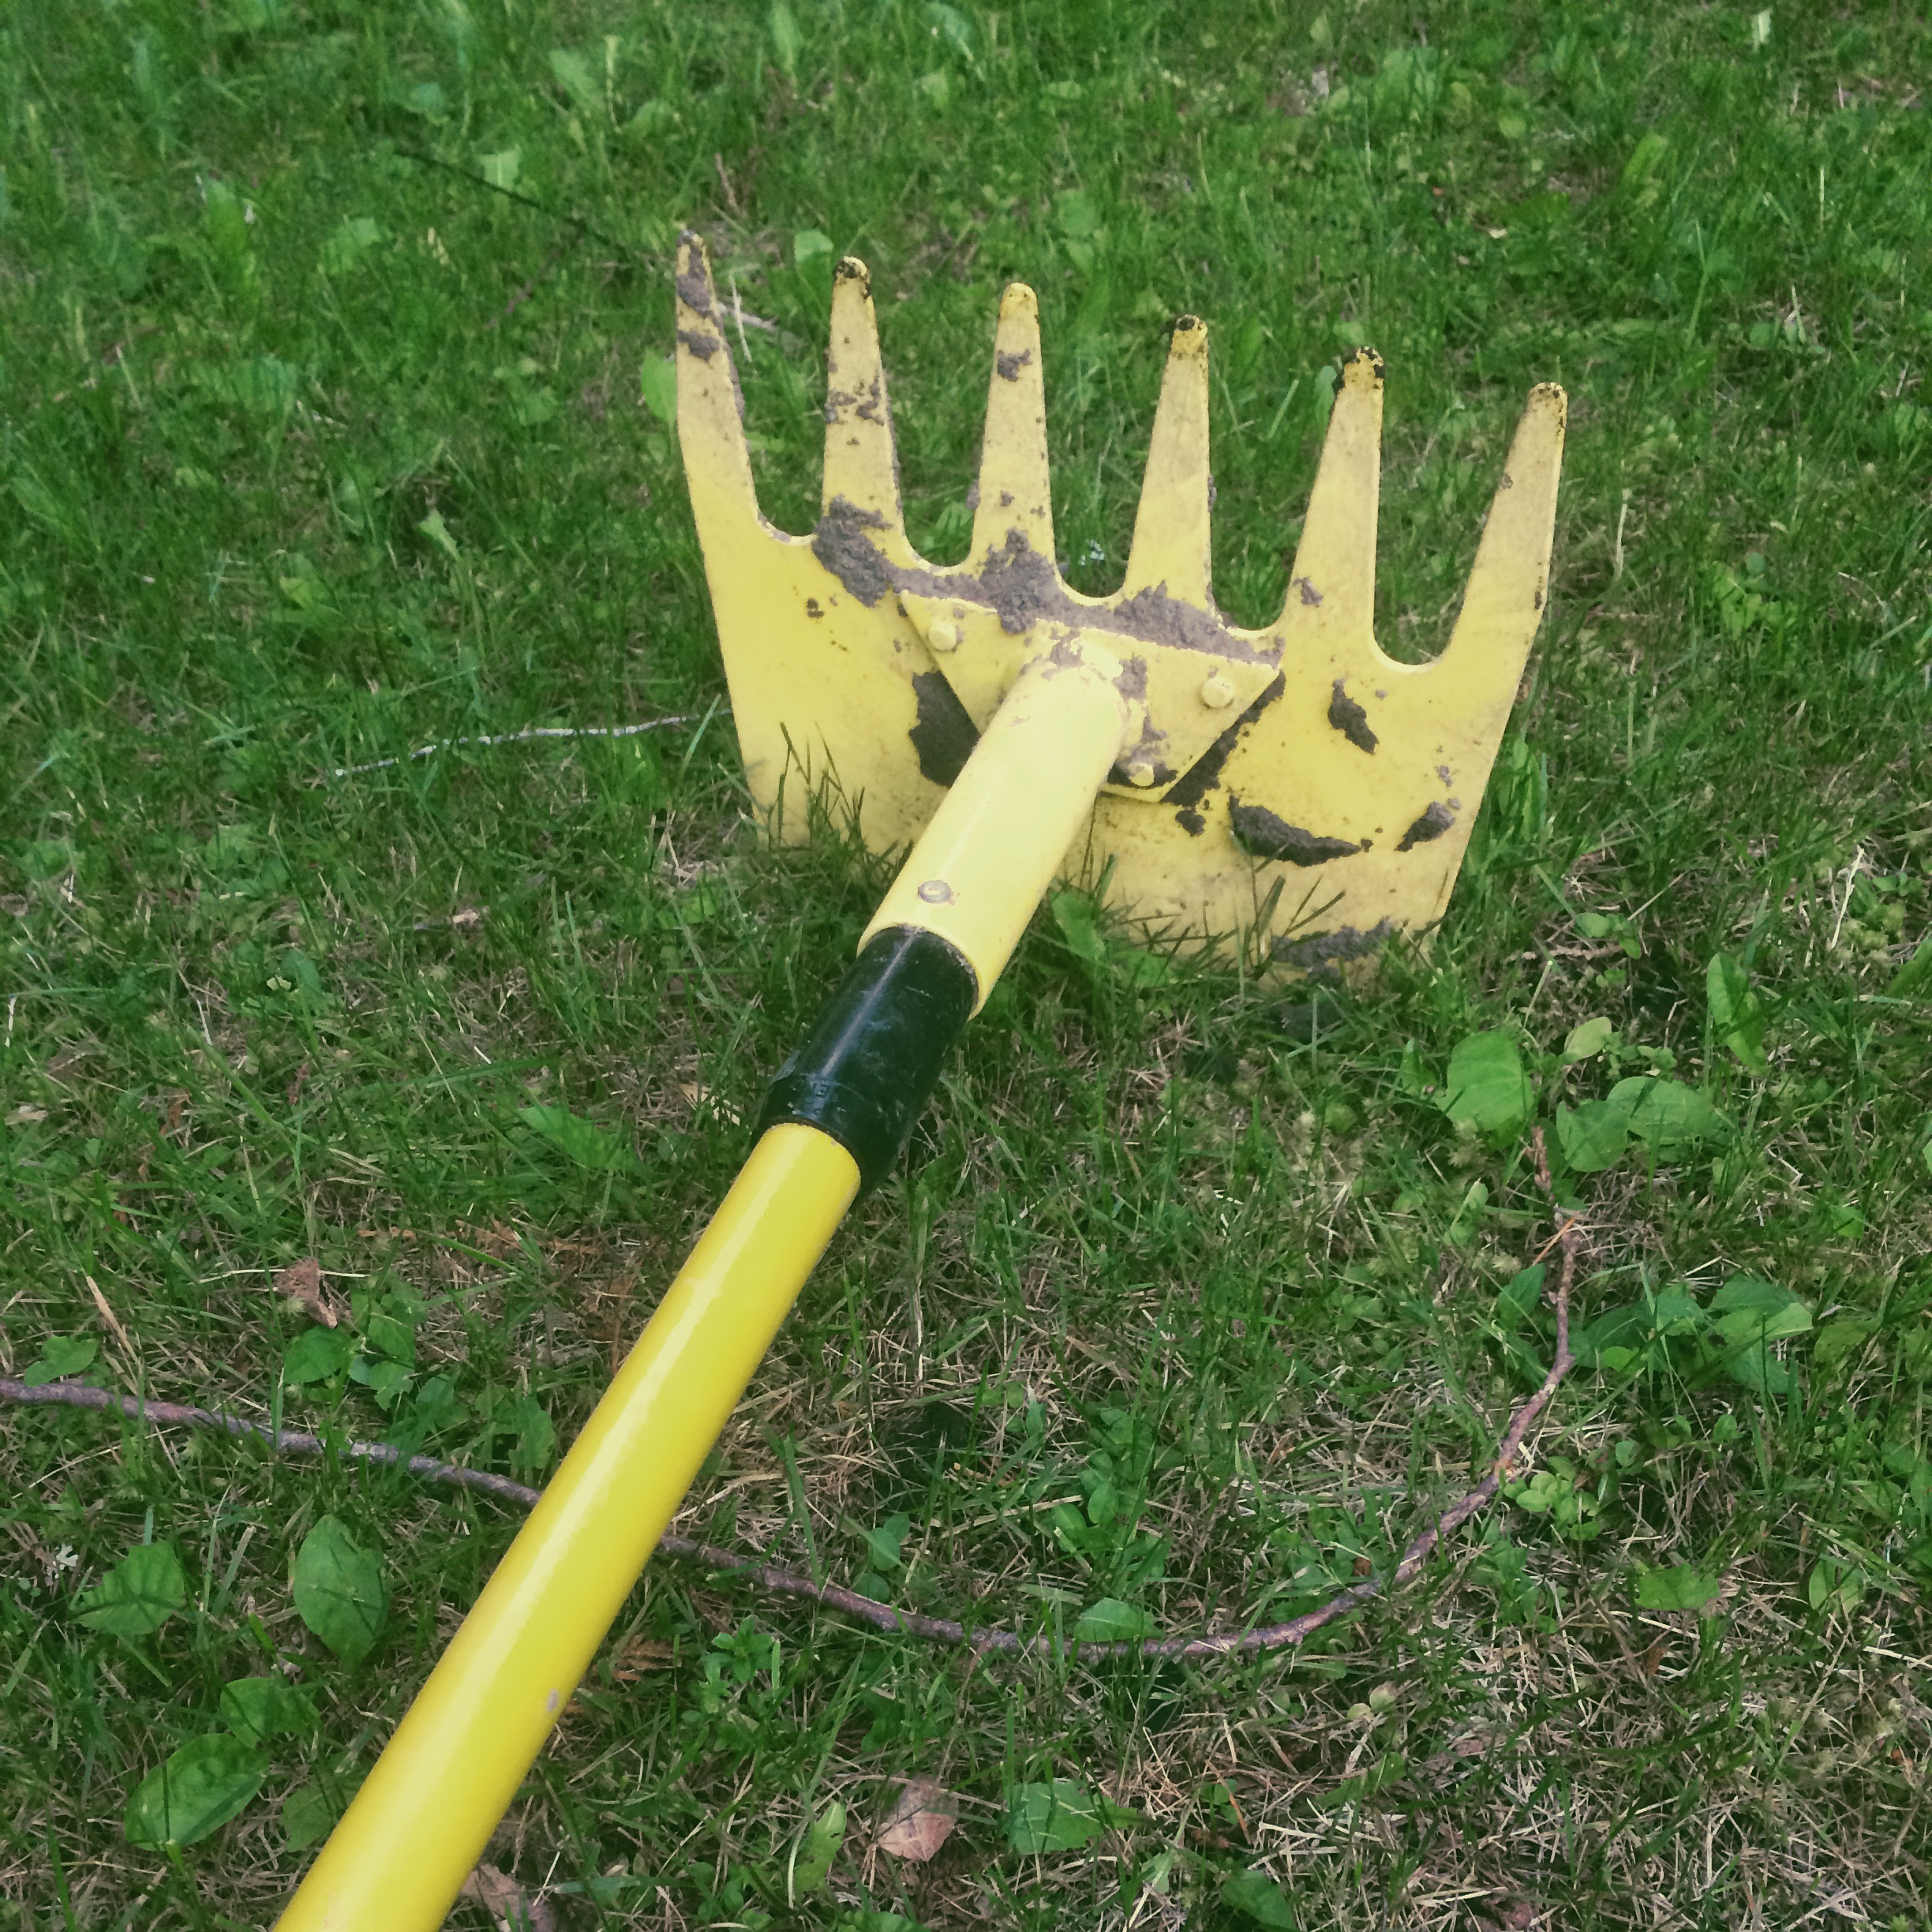
    Last summer I did an IMBA trail-building workshop and learned more about how to lay out ride-able, sustainable trails. Armed with this knowledge and my new McLeod rake, I set out to improve my trail. I laid out a new route at the top, eliminating three of the most problematic tight turns. I’ve spent the past couple of weeks working on that portion, about 75 metres in length.

    Now I’m dealing with one of the three remaining switchbacks that can’t be edited out. Ideally it should be a loopy turn with a loop diameter of about 25 feet. The problem, of course, is how one creates a relatively level 7-metre-wide platter of earth on the side of a mountain with a grade of 30-40 degrees, made of clay, roots and rock, with nothing more than a mattock and my trusty fire rake. I’m figuring high-speed flowy bike turns will have to be compromised in the name of preserving my sanity. I’m shooting for a 4-metre radius, something that will require  and even that is going to require a herculean effort. I think I’ll be able to snake my way through that at lower speed without falling over. I’m about a quarter of the way through my first such turn, and have spent probably 10 hours at it. So … yeah … this trail may end up being a lifetime’s work.

    Still, I am having fun riding my bike up and down the piddly first 150 metres.

  • House progress

    I really love our Nelson house. When we bought it I was sold on it as an investment, a fixer-upper, but I think I’m falling in love now. It has a really nice feel to the living space. It’s open and light and airy during the day, and yet at night it feels cosy and welcoming: the best of both worlds! I love the absence of clutter and the simplicity of the space. I know it’s probably just a matter of time, but I’m determined to do whatever I can to keep the junk from accumulating. (Maybe it will help that Chuck doesn’t actually live there!)

    Now that we’re establishing a fall routine of back and forth-ing, I’m love having repair and renovation projects I can pick away at when I’m there, rather than just feeling like I’m killing time during the girls’ activities. This week I did a fair bit of outdoor work, dealt with a couple of filthy floors and completed the stripping of a white bookcase in preparation for repainting it black. I’ve also been researching historical colour schemes for the exterior. The big project for next week will hopefully be drywalling the front bedroom. I’ve been making extensive use of Kijiji (our version of Craigslist) and have scored some lovely hand-scraped hickory to re-do the flooring in there too. Sophie is hosting three choir festival billets the first weekend of November, so I hope to have that room finished by then!

    • Finished converting my 1989 black Stumpjumper into a mountain city cruiser

  • Pergola completed

    Pergola completed

    With lights and wattle railing panels installed.

  • Pergola

    • A little help from Limpet
    Our “new” deck is almost five years old now. I always had bigger dreams for the square apron that extends towards the trees, but at the time we opted to put up a minimalist railing for safety reasons. Of course that had the effect of eliminating all the urgency of doing something else with the space.

    A couple of weeks ago at Fiona’s behest I ordered some nice globe lights to string over the apron. We spend a lot of time walking around Nelson and, being new to the whole business of neighbourhood rambles, we enjoy noticing the neat things people have done with their homes and businesses. We were admiring a lovely lighted patio and suddenly the push was on to enact some similar ambiance at home.

    Over the Easter long weekend, with all four of us home and available, we decided it would be an opportune time to push to get the project both started and [hopefully] completed. I had spent a few hours the previous week digging the screws and bolts out of the under-inner-side of the old uprights. Chuck had got busy reclaiming lumber from the remains of our old carport, cutting it down to the right dimensions.

    When we got home from Nelson mid-day on Friday the girls immediately got busy with the measuring tape, some cardboard templates and the jigsaw. Spring is still toying with us: while the sun shows up from time to time, temperatures tend to otherwise hover just above the freezing point, and today was definitely on the cool side. The fire pit helped warm our hands up when we needed. Between them Sophie and Fiona did almost all the 40-odd decorative ends for the beams.

    The first afternoon we got all the beams prepped and ready for assembly.

    Then we hit a couple of snags. First … it snowed overnight. It took a few hours for the snow to melt. And then we realized that the 8″ lag bolts weren’t quite long enough to anchor the two corner posts that had to be mounted into diagonal braces. Eyeballs and guesses had been substituted for trigonometry. That’ll teach us! The building supply store was closed for the holidays, so we were stuck.

    We did still manage to do a fair bit of assembly, using clamps and braces and gravity and what hardware we had. We got to the point of having the main structure standing, with the cross-beams laid overtop but not secured. The next time we have a chance to do some work, we’ll substitute in the proper bolts, attach the cross-beams, work on wattle railings and attach the light strings.

  • Trail-building

    Trail-building

    Armed with three hand-tools — a mattock, a rake and a saw — I have been gradually building a trail from our yard to the Galena Trail. For years I’ve been frustrated by the can’t-get-there-from-here dilemma that separates me from my favourite running trail. We planted a geocache down on the trail more than ten years ago, and the GPS co-ordinates proved what maps had led us to suspect: while it took 25 to 40 minutes to get to that point on the trail, it was only about 175 metres away as the crow flies.

    The problem with getting to the trail more directly was two-fold: the grade, and the vegetation. The direct point-to-point grade was about 47%, which puts you somewhere in the realm of a black diamond or double-black-diamond ski run: definitely not the right way to build a trail. And of course trees, bushes and undergrowth had to be circumvented or moved. I ended up with a trail of about half a kilometre long with an average grade of more like 15%. Definitely hike-able both down and up.

    It was a curiously addictive process. I would go out planning to spend 45 minutes touching something up and return to the house three hours later. There’s something about actually changing the landscape, of creating something useful out of nothing — well, not out of nothing, but out of nothing that looks like a road or a trail, nothing useful from a human locomotion standpoint. It was like having a superpower: I bisect the wilderness with roads, using my own two hands!

    Next year I’ll get to work extending the switchbacks to allow it to be closer to bike-able. If it was manageable on a mountain bike, one could get to town quickly without needing to hit the highway at all.

    I’m sure there will be places where the soil will settle and the edges of my trail will need shoring up. I’d love it wider in some places, even for hiking, and there will be oregon grape and wild rose and bedstraw and devil’s club to be tamed continually. But the route is laid out and for now it’s useable on foot. Meaning my favourite running trail is just four minutes away (eight huffing-and-puffing minutes on the way back).

  • Garage: before

    Garage: before

    We’re building a garage. Well… no, more to the point: we’re having a garage built. An important procedural distinction, one which will likely ensure the timely and effective completion of the project.

    The aging carport will come down. A year ago, expecting it to collapse under the weight of a fairly ordinary snow load, I enthusiastically parked the old minivan under it whenever I could, hoping for a catastrophic collapse that would crush the van. Alas, when spring rolled around, the carport was still standing, and the minivan still belonged to us.

    Now we have a minivan I treasure. I have no desire to crush it. I do, however, have a desire to park close to the house, avoid hours of windshield-scraping, and have a place to store bicycles and skis and camping equipment. You’d think with all the sheds and shops we’d have ample storage space, but somehow that isn’t the case. Almost all that space is filled with Chuck’s tools and machines and workspace and materials and might-come-in-useful-someday stuff. So yeah, I’m actually looking forward to having a garage.

    After we built the addition to our house back in 1997, the one that took us from four rooms to a dozen and gave us actual bedrooms for ourselves and our children, we realized we had almost no photos to remind us of what the house looked like before we so drastically altered it. We took pictures of the building process, but not of the “before.”

    Will I miss the way the reverse grade inside the carport allows for the formation of unexpected downhill sheets of ice? The kind that encourages vehicles to continue to exercise the Newton’s First Law of Motion as one attempts to gently apply the brakes in order to cease movement before striking the end wall? Will I miss the impossibility of reversing up a sheet of said ice? Or the door-obstructing upright posts? The leaky roof that supposedly performs the duty of keeping our firewood seasoned and ready to burn? The endearing 2-foot cedar tree trunk that is integrated into the whole contraption in some sort of organic and semi-structural way? Will I miss the overstatement of the term “carport,” when it is in fact merely a “front-end port,” meaning that rear windshields still need to be shovelled off and scraped free of snow and ice? Probably not. But just in case, here are two photos.

  • Dandelion syrup

    About 6-8 cups of dandelion flowers yielded about 1 cup of packed yellow petals. We mixed this with 2 cups of sugar and 2 cups of water, brought to a simmer and allowed to cook for an hour or so, gradually reducing in volume to a syrupy consistency. Then we added the juice of one small lemon, strained out the petals, and cooled.

    It tastes wonderful! Like spring sunshine mixed with honey and lemon. Delicious on ice cream.

  • Hello, trees

    Fiona and I have been visiting the trees in the forest that surrounds our home recently, appreciating them anew as they emerge from the snow and prepare for a new season of growth.

    Yesterday we checked out the red cedar bark, which we will use for basket weaving. Years ago the kids did a workshop with this lovely local lady, and while they’re a lot of work, the tiny baskets we have since made have been very striking and rewarding. It’s still too early in the season for it to come away easily in long strips, but we’re looking forward to harvesting some in May. We then dug up some red cedar roots, to decide how useful they’d be for embellishing our baskets. I had read that they make great sewing material, but had never taken the suggestion seriously. They really are amazing. The slenderest ones are strong, pliable and lovely to look at, and they dry and increase in strength very quickly once harvested.

    We collected armloads of white pine cones to use a fire-starter next winter.

    And then we made our acquaintance again with the birch trees. We tapped a couple of birch trees years ago, but our sap collection set-up wasn’t ideal and we didn’t get enough sap to make a proper syrup. Because birch sap is about five times less sugary than maple sap, you need a heck of a lot of it!

    Sometime in the intervening years I managed to purchase four spiles and today we picked up some clear 1/2″ tubing at the local hardware store. All it took was a quick bit of work with the portable drill and a couple of taps with the mallet the trees began spilling their sap out for us with eagerness. We plugged a couple of tubes into each of two glass carboys and within an hour or two had a couple of gallons of sap.

    I imagine it will be incredibly time- and energy-consuming to boil the stuff down, but I’m happy to do it just once, to experience the process and the taste of the syrup.

    Birch sap is sterile and contains trace amounts of minerals, xylitol and various other good things. It’s actually a great source of safe drinking water. Not that we don’t already have safe drinking water, but hey, when civilization crumbles, this might be a useful piece of knowledge.