Nurtured by Love

Category: Fibre arts

  • Temperature Blanket

    Temperature Blanket

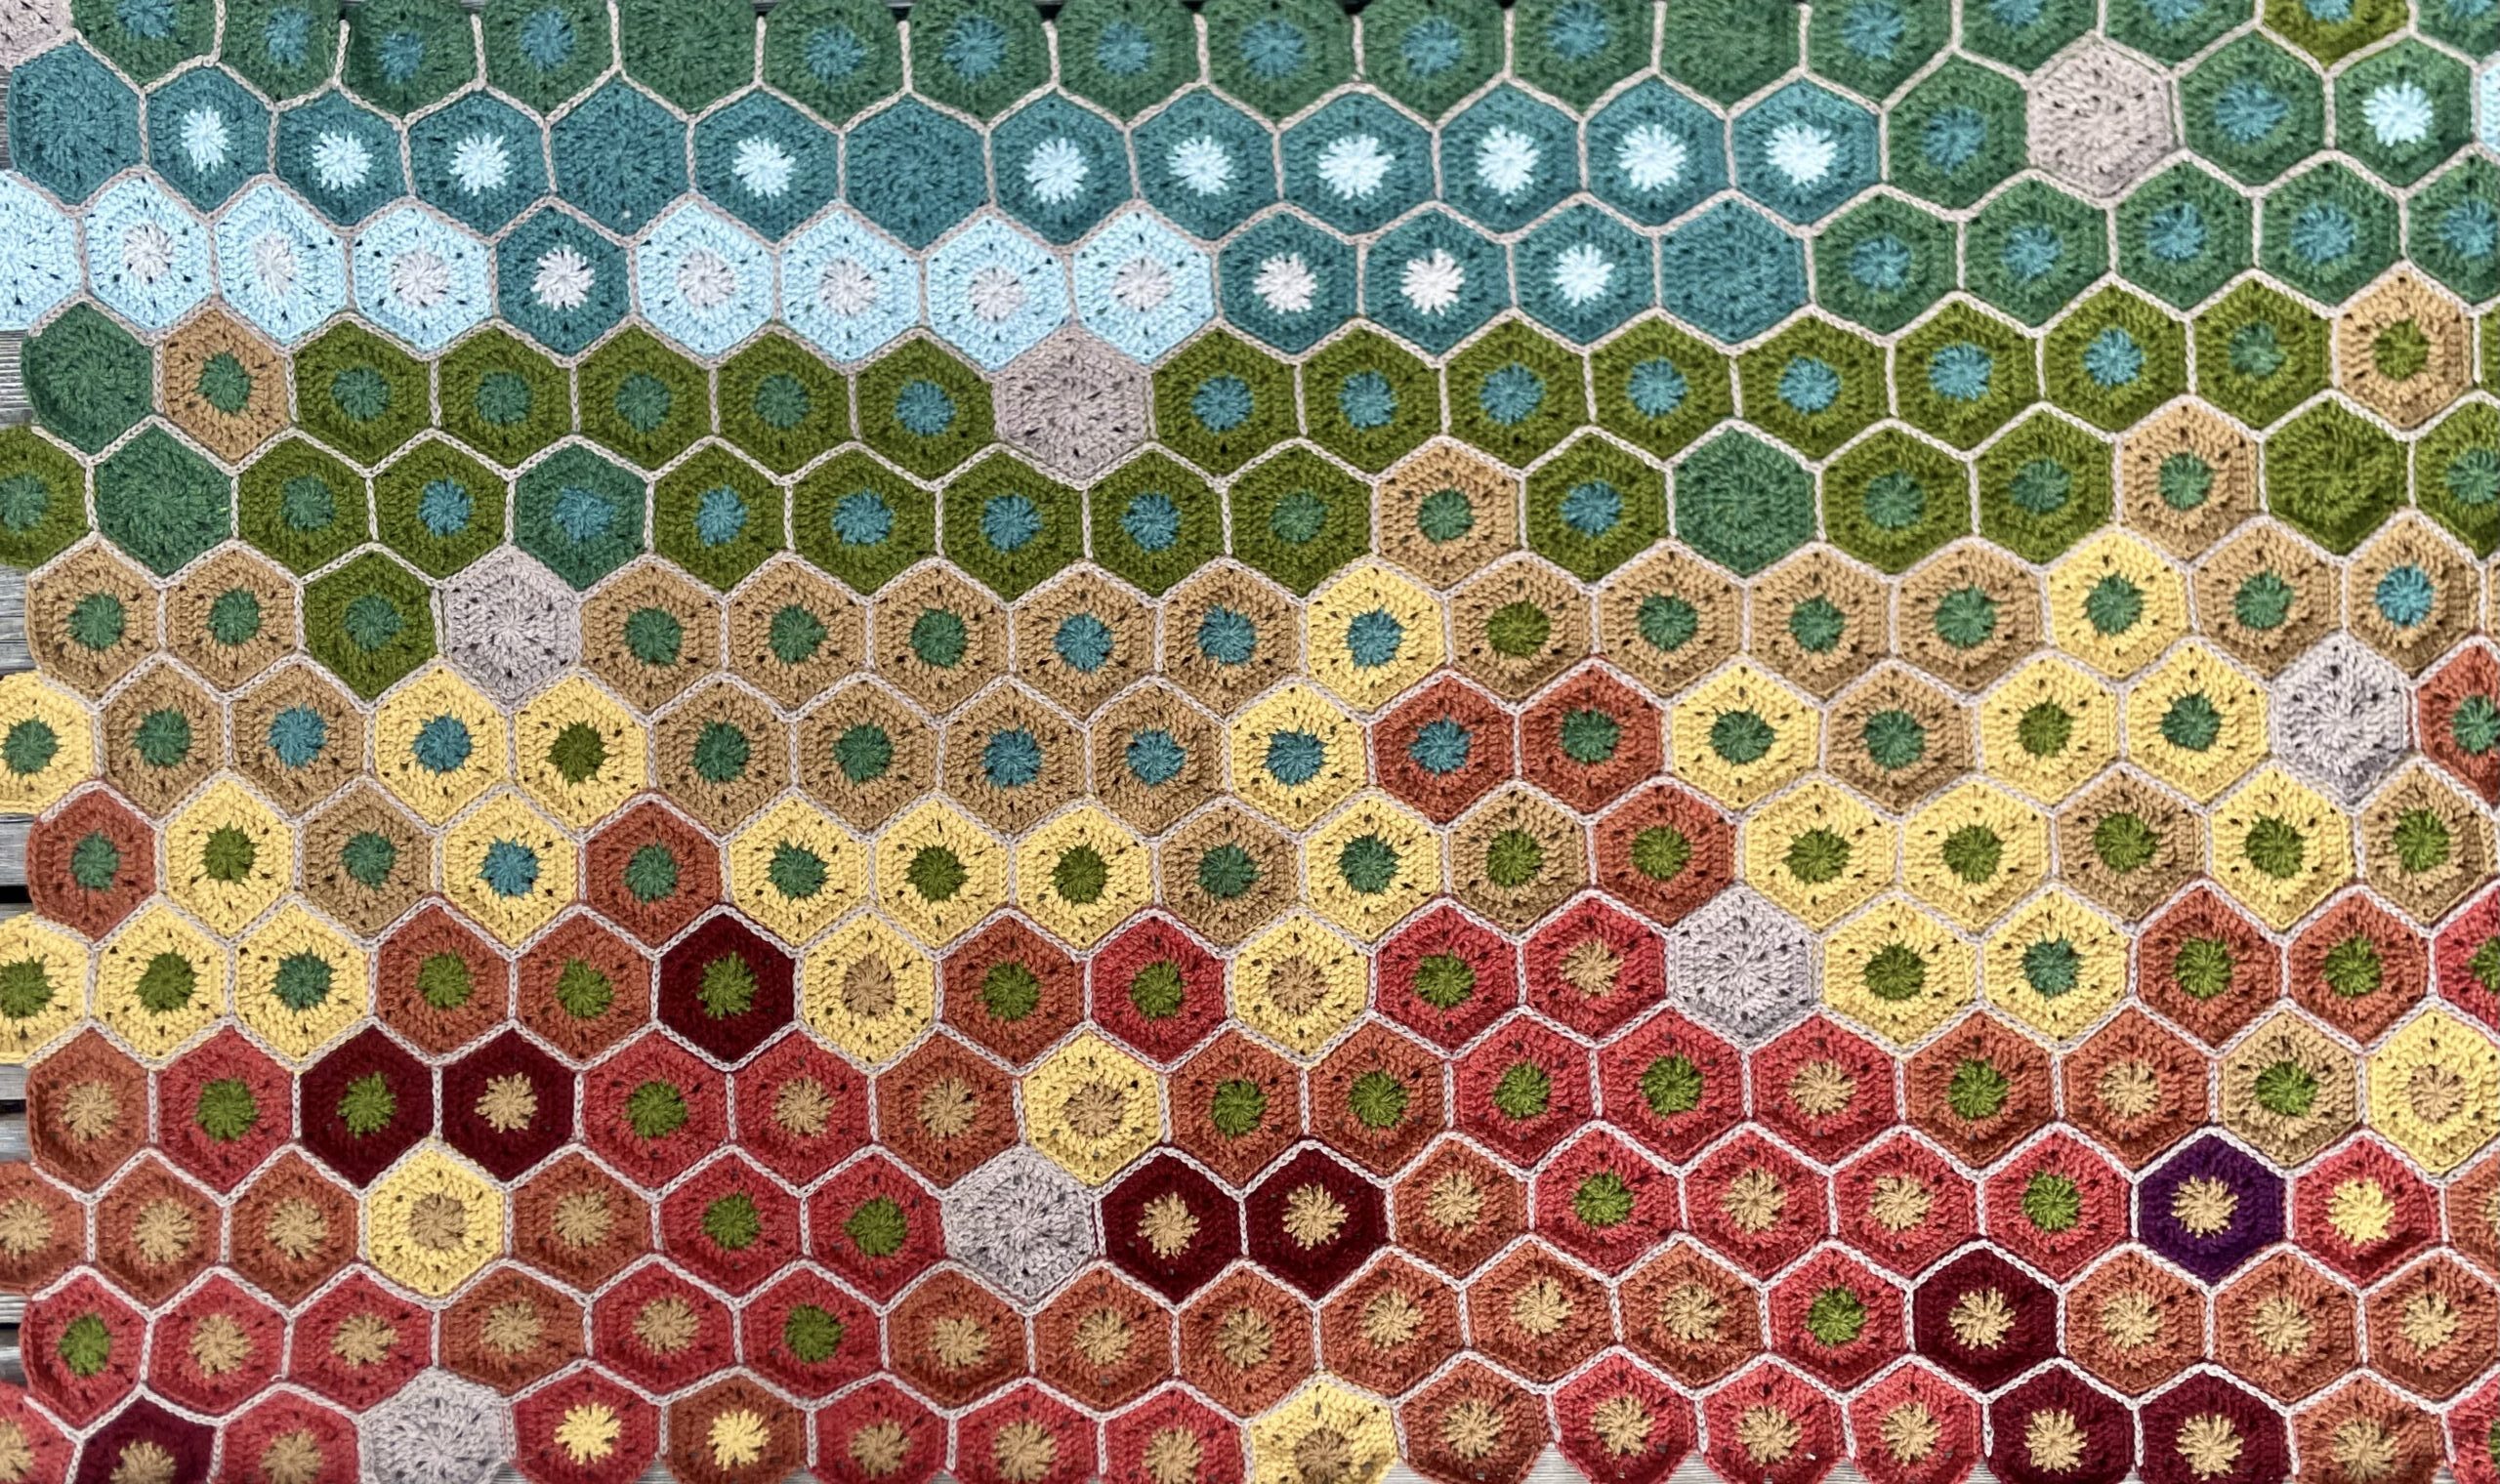
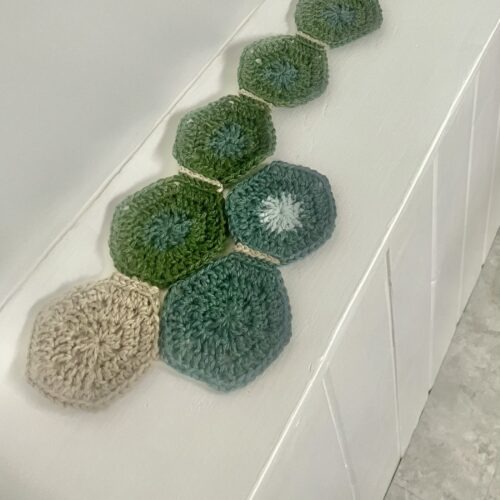
    I knit. I don’t crochet. But when I saw a particularly fetching temperature blanket design online, I figured I could learn how to make a hexagon. Almost four hundred hexagons, actually.

    A temperature blanket uses colours to represent daily temperatures, typically over the course of a year. Mine is a 2025 record of local temperatures: the low represented in the centre of each hexagon, and the high surrounding it. Because 365 isn’t divisible by two similar factors, I am including a month-marker hexagon at the start of each month, and one at the end. By including those extra thirteen hexagons, my total will be 378, and that number can be factored by 18 and 21. So my blanket has 18 hexagons per row, and 21 rows, and because of the efficient packing of hexagons that bees know about, it’ll end up being roughly square and a perfect (large) lap blanket.

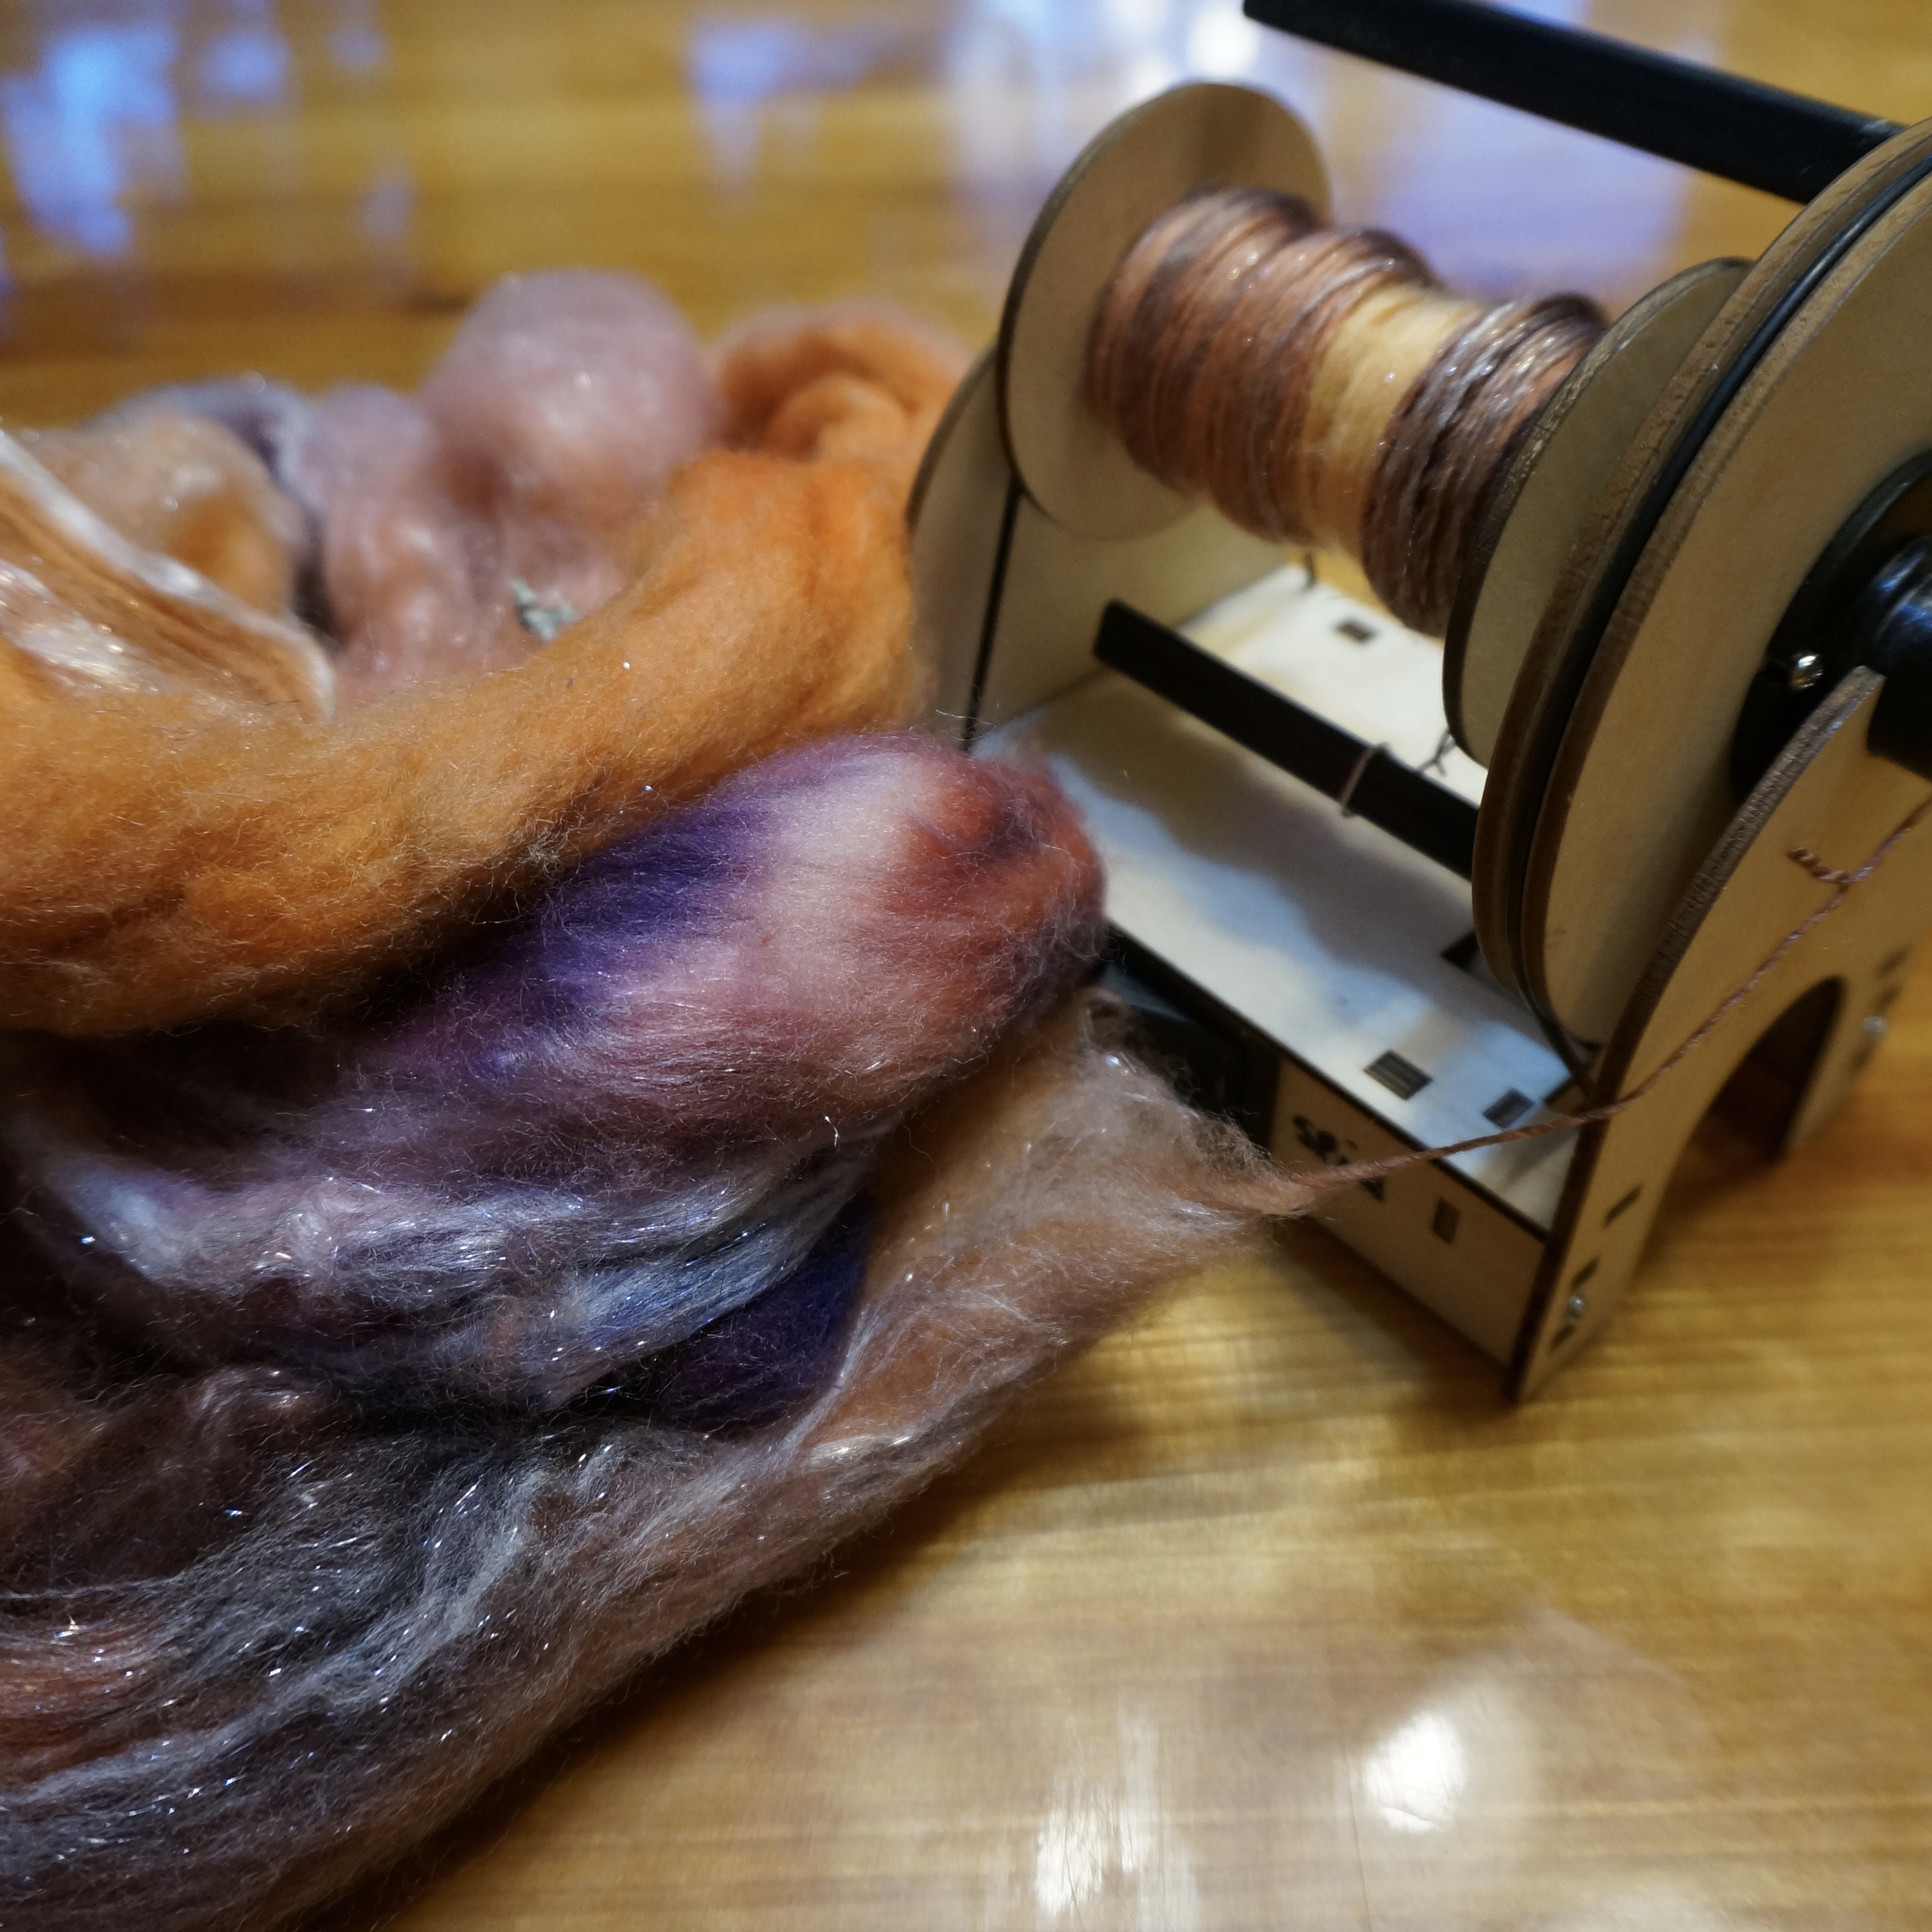
    I used divisions of 5 degrees Celsius with my coldest colour being “below minus 10” and my hottest one “above 35.” I went with Berocco Vintage yarn because of its (relative) affordability, ready availability and large colour range.

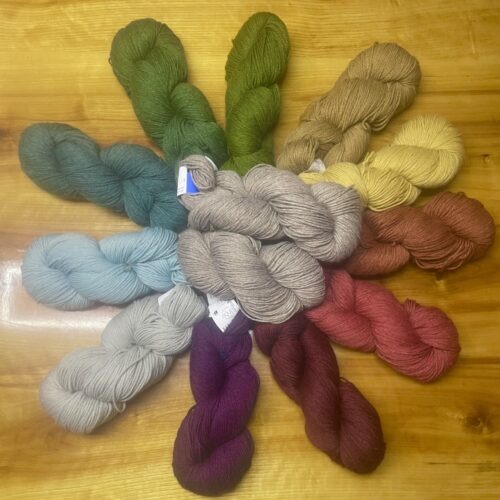
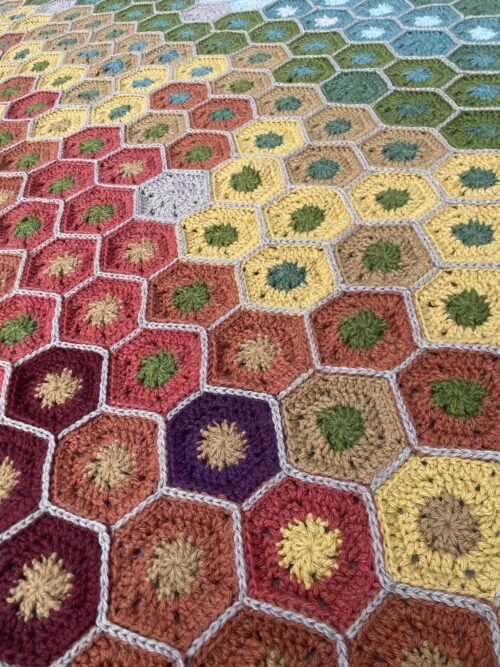
    Grey-white (8 o’clock on the wheel-of-skeins) is the coldest colour. From there they proceed clockwise through the blues, past the freezing mark to the greens, into the spring-like yellows, then the summery orange-reds, and up into the uncomfortable dog-days of the maroon and purple skeins.

    Most mornings I get up and the first thing I do upon coming downstairs is to check the Environment Canada temperature record for the previous day. Then I make my coffee, grab my yarn and make yesterday’s hex while sipping my coffee. It’s a nice twelve-minute ritual.

    The summer this year has been cooler and wetter than the past few years – thankfully! – but we did get one day with a high over 35 degrees, so I am happy that I have been able to use all the colours I planned out at least once. It has been so fun watching the design and the colour-shifts take shape, and my awareness of the back-and-forth shuffle of the seasonal temperature changes has been piqued.

    I suppose it’ll be a little less exciting as the year heads towards its conclusion, cycling through colour combinations I’ve already used. But so far my interest and energy for this project has continued. The only times I’ve gotten behind on my hexes are when we’ve been away, and I’ve caught up easily upon returning.

    Coincidentally a local friend of mine is sewing a temperature quilt. We had both started our projects before we discovered what the other was doing. It has been fun trading photos and sharing excitement as the temperature in February dipped to a previously-unseen low, or the afternoon high broke 25 for the first time in April.

  • Spinning

    Spinning

    I bought a little spinning wheel. It’s about the size of an SLR camera and weighs a fraction as much. It came from a Kickstarter campaign I backed. I paid about $50 and like my other favourite Kickstarter reward, it delivered not just on time but early! It runs off DC power with a tiny little motor. Years ago I spent a couple of days experimenting with a borrowed treadle spinning wheel and some (in retrospect) appallingly poor-quality fleece. The result was some ‘rustic yarn,’ and the sense of gratification was short-lived. This time around I have used proper spinning-quality roving I purchased, and have made more of an effort to finesse my skills. I am doing much better, and am entirely smitten with the process. What’s most fascinating to me is the way the colours meld.

    The photo above shows the first stages of the progression. I start with a big pillow of fleece dyed in swaths of different colours, some quite bright and prominent. As I spin one strand at a time onto the bobbin the colours take turns, sometimes blending a bit as they do. Then, when I ply the strands together into a ball of yarn, the dark and light colours entwine each other as often as not, and the brights become tempered.

    And then, finally, when the yarn is knitted up into a small project, the knitting creates even more blending and muting. This Scrunchable Scarf ended up being an amazing dapple of forest colours: moss, leaves, humus, lichen, bark and twigs. I would never have guessed how muted it would turn out from looking at the bold brights in the original roving.

    When I chose fleece for my second project, I decided to try for something a bit lighter and brighter. I found some fun glittery stuff, but I could tell from my previous experience that the purples were likely to overwhelm the lighter oranges, pinks and silvers. So I paired it with half as much plain sunflower fleece. Here are the pre- and post-spinning results. It looks like an awful lot of yellow:

    But here’s the result: still predominantly purple-pink, but with proper yellows peeking out from time to time. It is just about what I was expecting!

    Here’s another thing: I YouTube-taught myself to solder, in order to install a reverse switch. The original way to reverse the direction (necessary for plying) was to put a figure-eight in the drive belt, but that was causing a fair bit of friction and was unnecessarily fiddly. So I Amazon’d me a DPTP switch and got all the wires going to the right places. And … it worked!

    But I burned the motor out after just a few weeks. It’s a known issue with this little wheel if the uptake tension isn’t kept very low, exacerbated by the figure-eight drive belt issue I mentioned. They’re sending me a free replacement which is great, and I think I can avoid problems now that I have the reverse switch and know to minimize the tension. I hope it gets here soon; I’m missing the daily meditative colour-play.

    Also, it’s obvious I need a full-size traditional wheel as well. Need. Yeah.

  • Shibori

    Inspired by the introduction to shibori that Fiona got at her homeschoolers’ art class, I began sewing and tying a couple of dozen squares of cotton fabric to do my own experiment with the technique. I started this in July of 2012 and then set it aside, about two-thirds completed. I recently dug it out, finishing sewing and tying the last few squares, and then did the dyeing. It was so exciting to pull out the threads I had tied almost two years ago, not remembering what I’d had in mind at the time, not knowing what designs and patterns I’d used.

    Shibori is an old Japanese resist technique for fabric dyeing. It was originally developed by peasants who hadn’t the means to purchase woven patterned fabric. Traditionally indigo dye is used. In my case I have an idea for a quilt sashed with various washes of indigo-dyed recycled denim, punctuated by bright eye-catching squares of various shibori patterns, so I chose a deep red for the dyeing. I will probably regret my choice of denim, because of its heavy weight and the technical problems that will create when piecing a quilt top, but I suppose if it ends up feeling impossible I can buy some chambray and use that instead.

    There are numerous shibori stitching, folding and tying patterns. I gleaned some of my ideas from the internet, and invented or adapted others. Perhaps the quilt top will take another couple of years to come together, but I’ve had a lot of fun already and feel really satisfied with the results.

  • Shibori

    I’ve decided that the time has come to make a quilt. I made quilts for each of my children, around the time they graduated to big beds of their own. Erin got my first quilt ever: appliquéd jungle animals in the main squares. Noah was given a community quilt by a host of my friends, a colourful alphabet quilt. I later made him a more “grown-up” quilt, a repeating stars motif with black and turquoise whale printed fabric. For Sophie I made a quilt of drawings the older two children had made, embroidering a replica of each picture (Noah was very into dinosaurs at the time!) onto a square of muslin. Fiona got a tie-dye quilt: the older three kids and I tie-dyed individual squares in a rainbow of colours and designs, and added black-and-bold sashing.
    Who will get the next quilt? Perhaps it will belong to the grown-ups. Perhaps it will be a “spare bed” quilt. Not that we have a spare bed, but it never hurts to have an extra quilt around. 
    I have a vision of a quilt-top made of denim. I know this is a really challenging vision: denim is nasty to work with once you get more than two thicknesses of it. As you inevitably do piecing a quilt. But I have a good sewing machine, and a fair bit of ingenuity and experience. We’ll see. 
    I’ve been harvesting used-up jeans for years, and the local donation store is a ready repository of plus-sized jeans in a beautiful array of indigos. Denim will be easy to find.
    The striking element in my quilt will be the shibori sampler blocks. Shibori is a Japanese textile art. It’s a form of resist dyeing traditionally done with folding and stitching, using indigo. I first saw it years ago in a quilting book I bought. Then my kids were able to experiment with it during their art workshops with a local textile artist:
    The central motif here is done with cherry pits. The pits are pinched in the fabric and the “neck” of the pinch is wound with thread. The upper and lower patterns are what is called “mokume,” or wood-grain. they’re made by pleating the fabric with multiple parallel running stitches which are then tightened. The muslin above has been dyed with a fibre-reactive dye, exactly the same stuff we use for tie-dyeing. Lots of it lives in our basement. 
    My quilt will not use indigo either, except in the denim, nor will it use a traditional blue colour for the shibori. Instead the shibori blocks will be done in fire-engine red. I intend to make each of the two dozen blocks using a different shibori pattern or technique. Here are a few of my first dozen samples. The sewing is shown on the left, and the right panel shows the same sample with the thread drawn and tied as tightly as I could manage.
    Top: a fine-grained mokume. 
    Middle: Komu, a geometrically pleated technique using stitched squares and twist-tied cherry pits
    Bottom: Maki-agi, a stitched shape resist. 

    I have a dozen or so ready for the dye bath now. I’ve done a traditional arashi (diagonal pole-pleated resist), a heart in maki-agi, some itajime (folded shape-resist), some meandering ori-nui, and various other experiments. I have some extra fabric, so if a few of the squares don’t work out that will be fine.

    But I’m so excited to be accumulating all these surprises-in-waiting! It will take me another week or so to finish a couple of dozen samples. Then it will be dye time … and the big reveal!